

The Beginner's Guide to Cloth Diapering
The benefits, how to create a diaper system and an easy washing routine.

Why Choose Cloth?
Never Run Out
When you’re caught between diaper sizes for your little one, you never have to worry about running out of diapers. Instead, keep a stash of your favorite cloth diapering system on hand. Cloth diapers have more sizing flexibility than disposables, since you can simply adjust the snaps when your baby grows. Say goodbye to those last minute, late night grocery store diaper runs!
Natural Materials
If you’ve been wondering what your disposable diapers are actually made of and want to look for an all natural option, this is perfect for you. With cloth, you can choose from a wide array of natural fibers, including cotton, bamboo or even wool. I’ve found that my babies get less diaper rash outbreaks when I use cloth, and I think it’s because the material is gentler for delicate baby skin.
Budget-Friendly
Did you know you can save on nursery storage space by switching to cloth? You don’t need to stock boxes of diapers anymore. Instead, you just need to keep about 10 to 30 cloth diapers on hand (depending on your little one’s age). Cloth diapering is often viewed as more budget-friendly, since you only have to buy the diapers once. My suggestion to soon-to-be moms on a budget is to add cloth diapers to your baby shower registry. Because cloth is made from better quality materials, it does have a steeper up front cost compared to disposables. But, these diapers are meant to last you for years. You can also consider looking for used cloth diapers on Facebook marketplace or at a local baby consignment store. Just make sure to do a deep cleaning of them before use.
Return to Tradition
Did you know, back in the day, the diaper companies really had to convince mothers to switch to their disposables? The mothers back then thought disposables were a cheap alternative. Today, in our fast-paced society, it feels like no one wants to slow down. There’s something therapeutic about diapering your baby the same way our grandmothers did. Cloth diapering gives you a unique sense of self sufficiency, in that you don’t need to rely on modern synthetics like polyethylene and polyacrylate. You can also know that if you were in a situation where you didn’t have access to modern grocery stores, you could still diaper your little ones.
Consider Hybrid Diapering
The switch to cloth diapers can be intimidating. If you have multiple littles that require you to buy a lot of diapers, the cost is definitely a factor. No one says cloth diapering has to be all or nothing. You can enjoy most of the benefits of cloth while using them part-time. One option is to use cloth during the daytime and keep disposables on hand for overnight and going on outings. This is also a great option if you’re not sure about cloth and don’t necessarily want to go all in yet.
The Diapering System
The first step in cloth diapering is figuring out what diapering system is right for you. There are a large variety of cloth diaper types and combinations to try. Here, I’ll discuss the various types and then make my recommendation based on what has worked for our family.
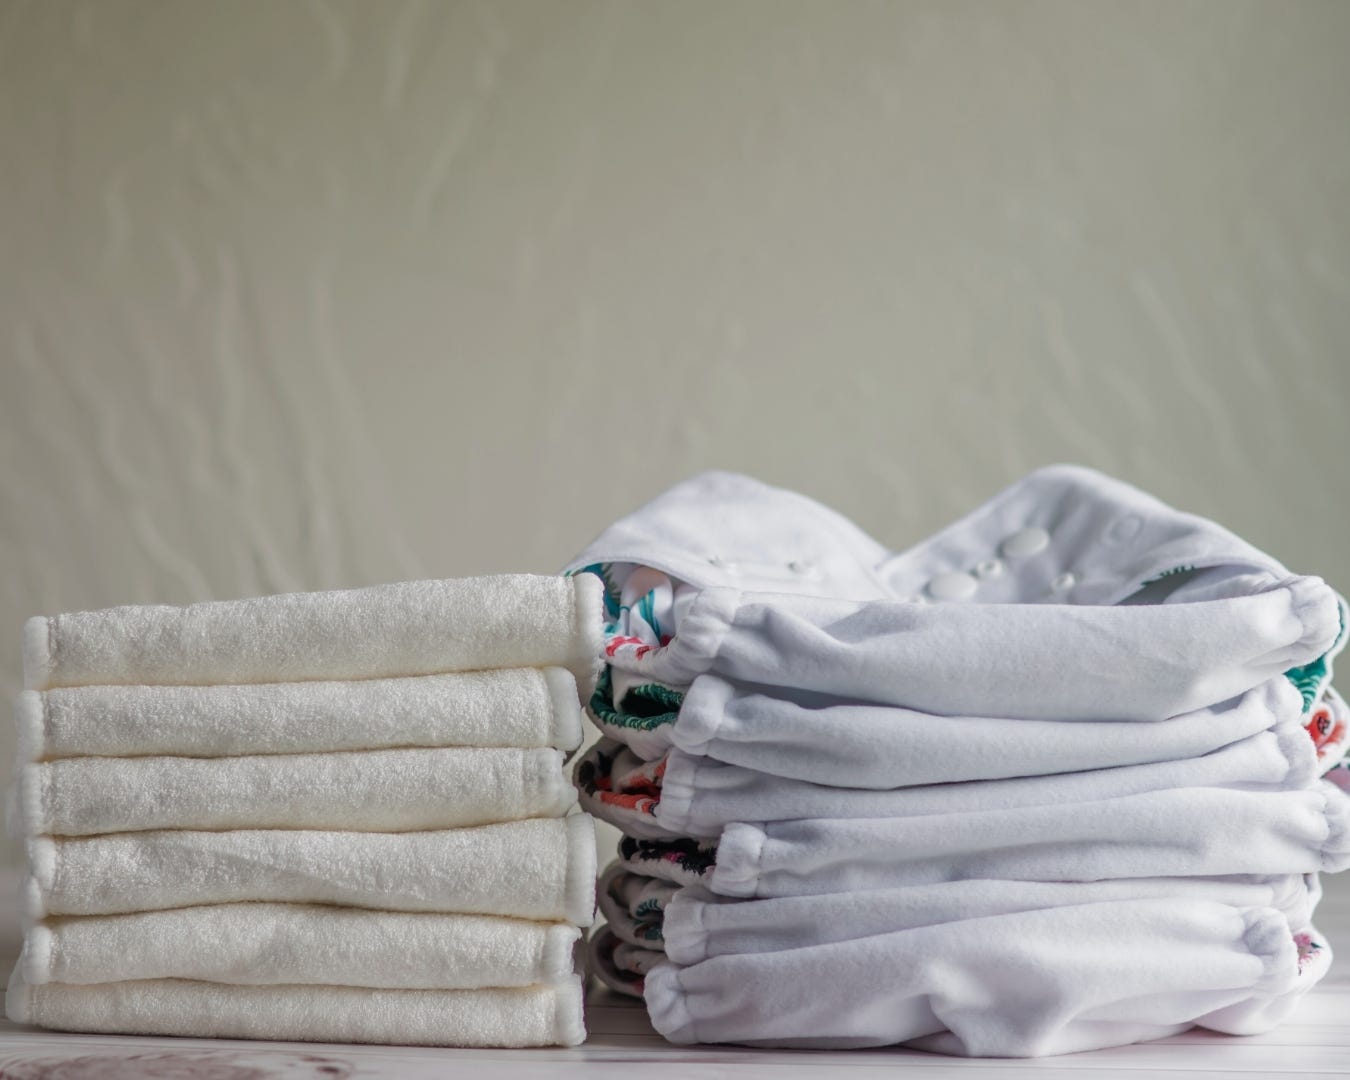
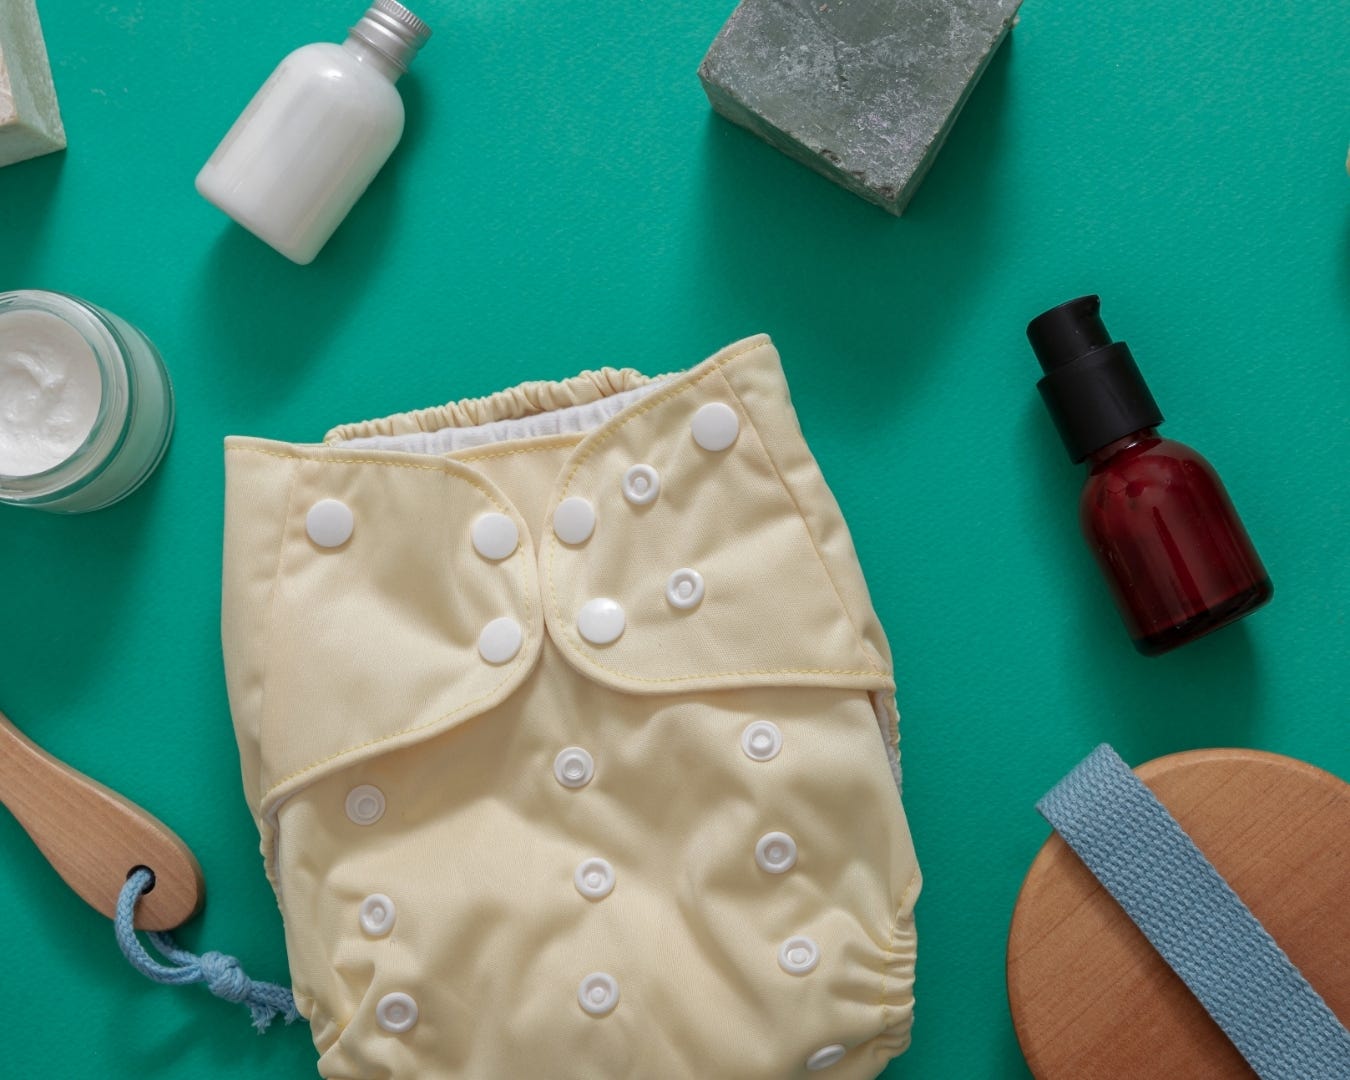
The two key parts of a cloth diaper are what we call the inner and the outer. The inner is the absorbent layer, often made of bamboo or cotton and the outer is the waterproof cover, often made of polyester or wool.
Pre-folds: A flat piece of absorbent cloth that is manually folded to fit baby and secured with a clip or pin. Requires outer cover.
Fitted Diapers: An inner that is fitted to the baby and has built in snaps, similar to the outer cover. Requires outer cover.
All-in-One: One single fitted diaper that contains an inner and outer sewn together. No outer cover required.
Pocket Diapers: A fitted diaper that has a pocket to insert an absorbent inner layer into it. The pocket diaper acts as the outer cover.
The most popular cloth diapering system today is pocket diapers. I don’t prefer these because pocket diapers are often made of polyester and “stuffing” the inserts into the diapers can be quite a chore as a busy mom.
I’ve really enjoyed the fitted diaper system. You can still use the popular outer covers on the market, but you can choose what inner is best for you. And, no diaper stuffing is required! I really love the Nora’s Nursery outer covers used with Green Mountain Diapers’ 100% organic cotton “Cloth-EEZ Workhorse Fitted Diapers.”
This part of cloth diapering requires some trial and error to learn what system works best for you and your family. You also may decide you like a certain system, like the all-in-ones, for your newborn baby, but then you switch to pocket diapers as your baby gets older.
Just remember, with proper care and maintenance, cloth diapers can last your family for years. Don’t let the higher investment cost scare you. With disposables, you’re paying for the ease-of-use. With cloth, you’re paying for good material that will last.
The Washing System
While washing cloth diapers can seem intimidating, it’s easier than you think. Once you add them to your laundry routine, it’ll seem like a piece of cake. Here are the six simple steps I take when washing my cloth diapers:
1. Separate and Sort
Separate the outers and inners, removing any inserts from your diapers. Place wet diapers directly into a wet bag. A wet bag is a waterproof laundry bag used for cloth diapers. It’s best to keep the bag open to prevent odors and allow the diapers to air out.
2. Spray Off the Poo
For poopy diapers, I recommend installing a bidet sprayer, so you can easily rinse them off into the toilet. Be sure to remove solids before placing poopy diapers into a wet bag. This also helps prevent staining.
3. Quick Rinse Cycle
When it’s time to wash, empty the wet bag into the washing machine and put it in with the diapers. Add a small amount of laundry detergent and run a quick rinse cycle with hot water. Visit my laundry day article for my gentle laundry detergent recipe.
4. Regular Wash Cycle
After the quick rinse, add more laundry (this will help agitate the diapers for a better clean) to the washer along with a regular amount of detergent. Run a regular wash cycle with warm or hot water. You can add vinegar if you feel like the diapers need a deeper clean.
5. Machine Dry the Inners
After second wash is complete, move the inserts and inners to the dryer (along with other laundry). Run the dryer on a regular cycle on medium to high heat.
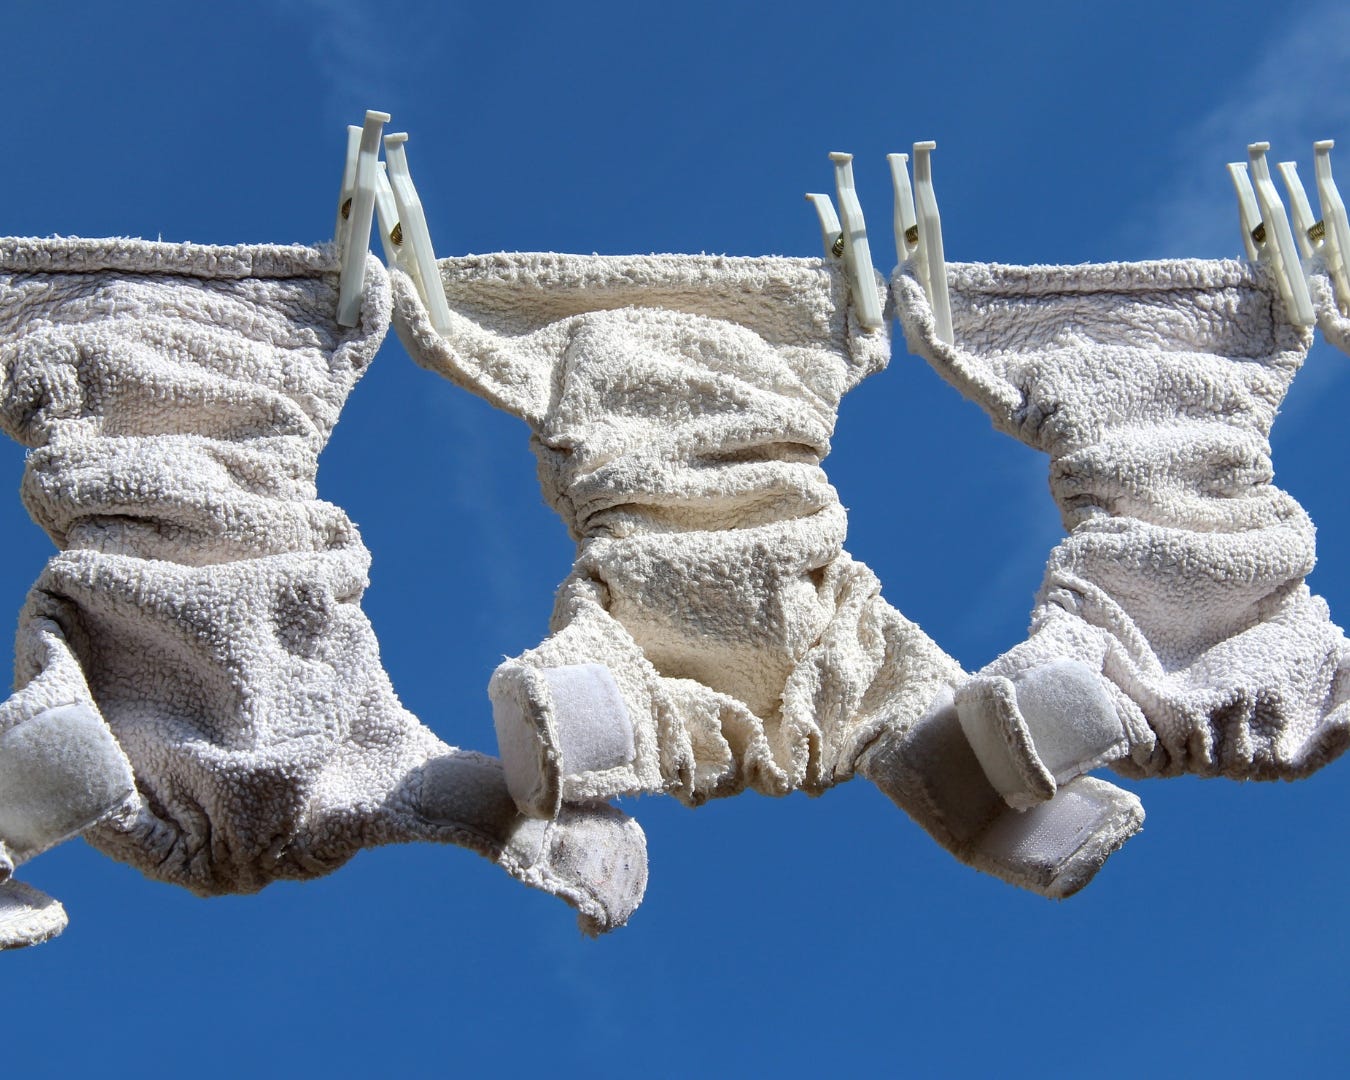
6. Hang Dry the Outers
Be sure to hang dry the outer covers, All-in-One diapers and wet bags. The heat of the dryer will damage the elasticity of your covers and ruin the fit.
A Note on Washing:
When you buy new cloth diapers, you may need to run a special wash cycle to maximize the diapers’ absorbency. Be sure to follow the special instructions provided by the diaper company.
Diaper Rash Creams:
You’ll need to choose diaper rash creams that are safe to use with cloth diapers. Some creams will stain your diapers over time and ruin the absorbency. Check out my go-to diaper rash cream here.
Get the Free Magazine
Download the free Homestead With Grace Magazine and enjoy an aesthetically pleasing reading experience, complete with printouts, recipes and more!